Showing posts with label creative. Show all posts

Sunday, 23 August 2015

Wedding Ideas!

Hello everyone!

If you have read the title of this blog post, you may be thinking that i have some very exciting news..! Well, I'm pleased to say that you are right! I'm ENGAGED!! I am so very happy, I have all of the most wonderful feelings!

So, since I'm getting married and it's all I can think about, I thought I would share a a blog post on all the ideas I have had to maybe give a little wedding inspiration for others. And if you aren't getting married...well it's never to early to start planning!

So first things first, I would love to share with you my engagement ring! Of course the picture never does a beautiful ring justice but here it is!


Its a vintage preloved ring which meant that we got a lot of diamond for our money! I would so recommend getting preloved if your are looking for a ring. It comes with its own little story and journey, and its a nice feeling to think you are making it feel loved all over again! 

I think i am at a lovely stage of the wedding planning process. We have our venue booked and guest list almost sorted (phew!! worst.part.ever) so now i can focus on all the lovely little details like the table decorations, flowers, favours, etc, etc. I am sitting here smiling just thinking about it ! 

SO, here a are few ideas i have thought would make a wedding a little bit unique! 

  1. Flat shoes for tired feet!
Every lady knows there is a constant battle between comfort and looking good. Do i wear the amazing high heel that makes my legs look never-ending ? Or do I go for the lower, I know I will last in these kind of shoes...?!
Well, i thought that it would be a pretty cool idea to give the ladies that decide on looks over comfort, the opportunity to relieve her aching feet for the evening.
So, i am going to have basket full of flip flops tied up in a cute little bow in the ladies bathroom. I think that it will make things a little more unique and i am sure i will be the best friend of lots of aching feet!


I managed to find a picture on Google of exactly the kind of thing I'm looking to do. I love the
 way this lady has labelled the basket 'Dancing Shoes'. I think i may have to steal that idea!


2. Homemade favours

When my sister and brother got married (obviously not together) they both had homemade favours and everybody enjoyed them so much, i knew it was that i wanted at my wedding. My sister had a brilliant idea of giving everyone a photo in a frame summing up the reason they are at the wedding. Whether it was just a lovely photo of the guest and the bride, or a big family photo, it was a really lovely touch and made it feel very personal. It is defiantly a gift the guests will keep! 

For the favours at my brother's wedding, they made homemade sloe gin in cute little bottles. It was amazing! They went and picked the sloe berries together and took a photo of themselves doing so which they stuck on the side of the bottle. It was so lovely and of course everyone remembered to take it home! And for the non drinkers or children, they filled the bottles with  small sweets.

The idea i have for my own wedding favour is homemade jam. I thought that i could get some lovely small jars and make a label up saying something like 'Spread the love' and 'Jam packed with love'. Here is a picture of what i am looking to do.


3. Wedding games

Weddings are long events so it is always great to have an activity that all the guests can get involved in. At my brothers wedding, they set up an adult treasure hunt in the garden to find various little bottles of alcohol. It was so much fun and people still talk about it now. If you didn't want to use alcohol , you could use sweets or little gifts :)

You could also have a little quiz all about the bride and groom after the wedding breakfast. People can work with their table and the winning team could have a free drink or you could buy a small gift already prepared.


So there are just a few of the ideas i have had to make wedding a little more unique. I am sure that as time goes on i will post more wedding themed posts! If you have any ideas that make a wedding that little bit more special, i would LOVE to hear it!!

Thanks for visiting :)

Alice 
xx


Tuesday, 6 January 2015

2015 to be Favourites

Hello!
 
I know the year has only just begun, but I thought I would share with you some of my for sure to be favourites of 2015 as I'm already loving them and it's only 6 days in! I haven't done a favourites post as yet, so it was really fun picking out bits and bobs that I am really enjoying at the moment. So without further ado, I present to you my to be 2015 favourites!


First up, I have the US TV series 'New Girl'. I absolutely love this programme. The only show I can liken it to is Friends, and I am obsessed with Friends: it's my all time favourite TV programme! New Girl never fails to make me laugh out loud and will always cheer me up. I am watching at least two episodes every night at the moment with my boyfriend which is a really nice thing to do together after a long day apart at work! Especially as it's winter and its nice to cosy up on the sofa. If you want to find a comedy that will not fail to make you laugh, this is the one for you! If you have seen it, isn't Schmidt just the best!?? 


This is a necklace that I love wearing at the moment. I got it for Christmas so not entirely sure where it is from, but know you can get very similar ones in normal high street stores.  Its so simple it literally goes with anything and can glam up any plain outfit with the sparkly stones that line the circle. I don't usually wear gold, but thought that this looked so elegant I couldn't resist loving it. I am certain this will be a key piece of jewellery for me in 2015! 


Now although this isn't exactly a product you can buy, but I wanted to share it with you because its such a cute, thoughtful gift idea. For Christmas, my best friend made me a little keepsake of 52 reasons why we are best chummys. She wrote them on a deck of playing cards by sticking bits of paper over the middle of each card and binded them all together. This is something I will keep close to me throughout 2015 to flick through when I'm feeling a little sad. Its bound to cheer me right up!! This is a great idea to give to someone special that is thoughtful and low in cost!


Next up I have Bobbie Brown's Long-wear eye liner. I have been using this so much recently! Its gel based and is applied very easily with an eyeliner brush. It's so soft to apply and gives you great control if you wanted to a more detailed style. It lasts a really long time, and even longer if a primer base is applied. This is a product that I will always be reaching for in 2015!


Take That's album! Need I say more?? This is TT's first album since going as a three piece and I think they have never sounded better. Every single song is brilliant, with not one feeling like an "album filler". It has the perfect combination of upbeat and slower songs each one just as catchy. I could listen to it over and over again, which is why I am certain this is going to be a 2015 favourite!


Keeping with the music theme, I have the McBusted album on my list! Now, I'm not going to lie, I'm a McFly girl and always have been (a true GD some may say) which is why I love this album. Anything involving McFly will be on my favourites list and I'm excited to have it for 2015. I feel like I don't really need to explain why this album is great, just listen and the music will tell you!


I have another necklace that I am really loving at the moment and has made me favourites list. Just like the necklace before, it goes with everything and adds a touch of "coolness" (could I be any less cool saying that..?) to your outfit. It has a very long adjustable chain so you can wear it with so many different style tops/dresses. I feel like it won't really go out of fashion which is why I'm happy to have it as a 2015 to be favourites list! Plus Holly Willoughby has a very similar necklace and I love her!


Now I'm sure a lot of you have probably read this book, but OMG! Its just great! I literally stayed up till around 2.00am last night because I couldn't put it down. I am around 3/4 of the way through and can't wait till bed time so I can finish it! It has the perfect amount of romance and friendship in it making the book relatable, exciting and heart warming. I am so happy I have this book and I am sure I  will read it for the second time in 2015!


My final favourite to be of 2015 is my camera. Now I couldn't really take a picture of my camera because that would be a little bit difficult to do, so instead to represent my camera, I have a few pictures I have taken out my bedroom window. This year I wanted to take more pictures, so I think I've done well so far! Even if we are only 6 days in...hope you like them! (Spot the only star in the sky!)


Links to products:
 
Have you got any for sure to be 2015 favourites?
 
 
Cheerio
x

Sunday, 19 October 2014

Spookily Easy Pumpkin Carving

Hello!
With the autumnal season in full swing it means only one thing: Halloween! Although I have never really celebrated Halloween, when the shops are filled with bundles of pumpkins, I can never resist buying a few to have some carving fun. 

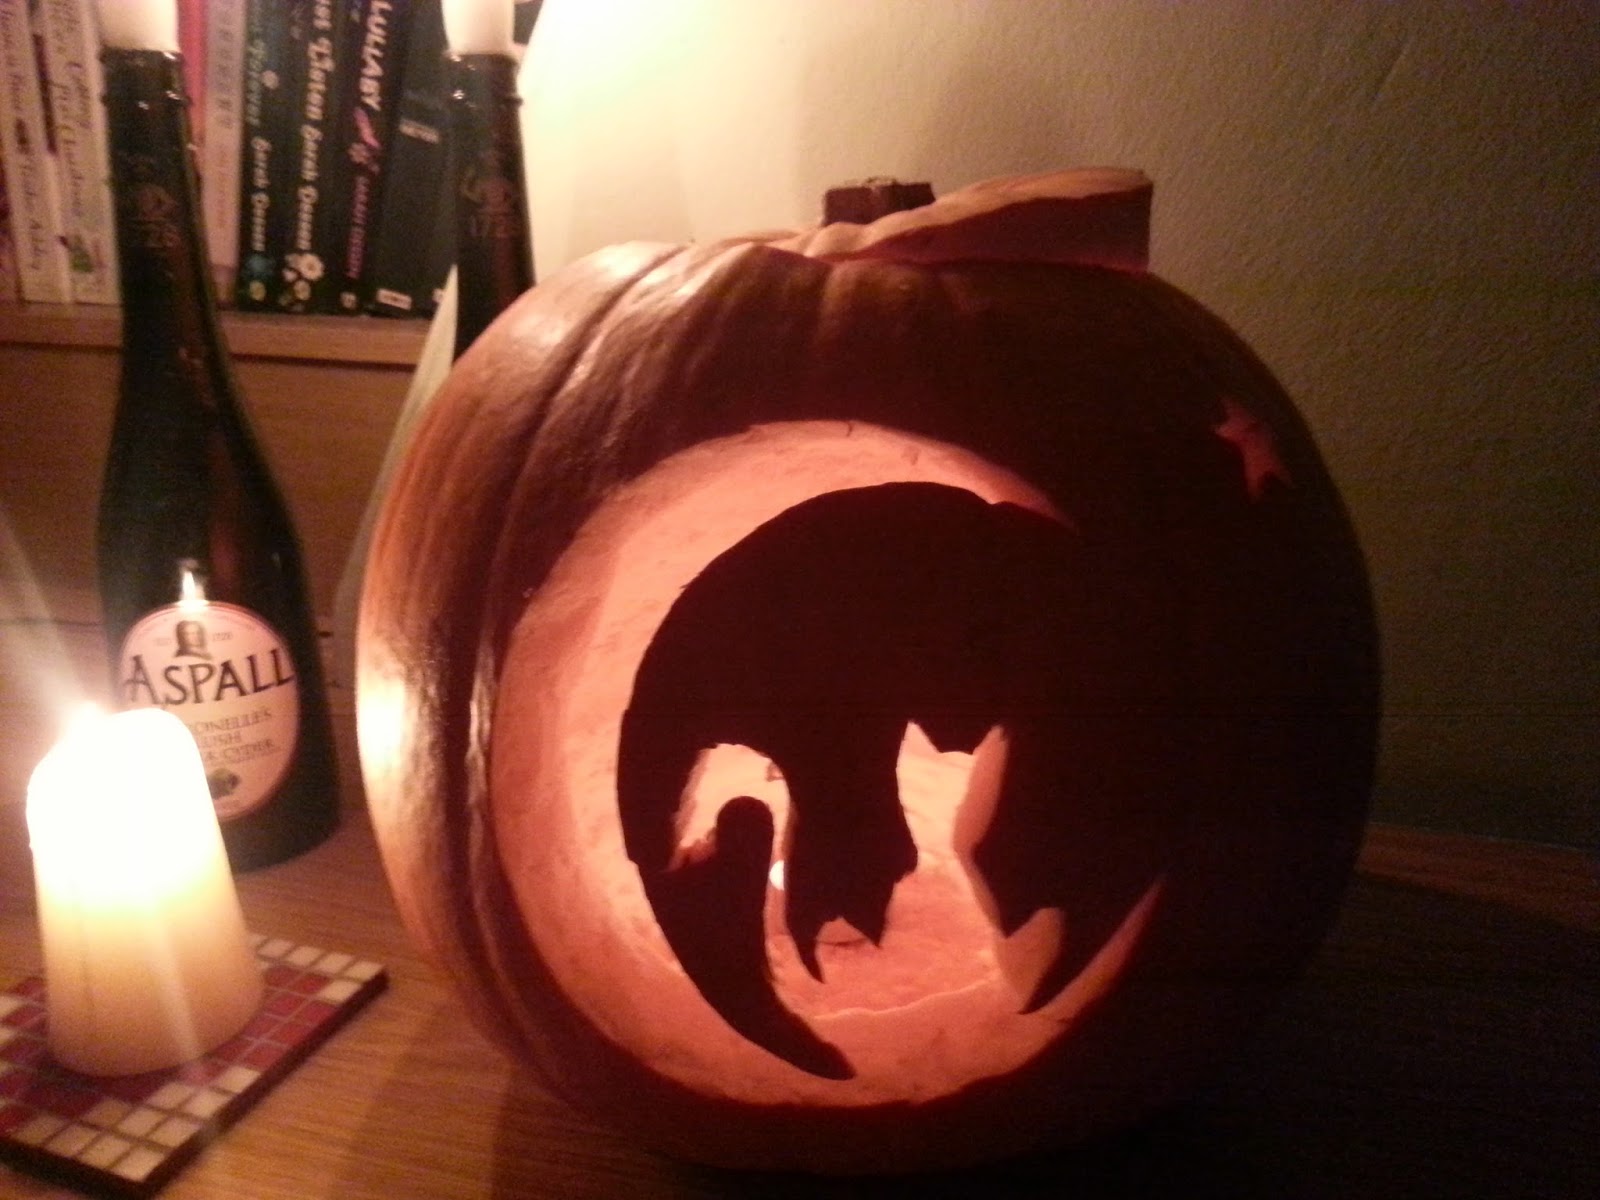
I have always been envious of the people who are masters in the art of carving pumpkins producing elaborate designs, while I am creating the standard triangular eyed, zig-zag mouthed monster that never ends up looking remotely scary. So this year I decided to be a little bit clever (some may say cheat) and see if I could use a template to carve my pumpkin. Believe it or not it actually worked, so I would like to show you how I did it so that we can all be masters of pumpkin carving, if you aren't already one... 


This is what I needed to be able to carve my pumpkin. As you can see I managed to find a cat themed template! Just wonderful!


Before I start to cut my pumpkin, I will always draw a circle around the top as a guideline for the hole that allows you to gut the pumpkin. Its so much easier than doing it free hand and brilliant for us perfectionists! 


This is the worst part of the pumpkin carving for me! I hate the smell, texture and mess it makes! Plus is pretty hard work scraping all the flesh from the edges (this sounds awful!) 


 Once you have got past getting all the insides of the pumpkin out, you will be able to stand back and receive lots of satisfaction from creating a lovely clean pumpkin! And now the fun part begins! 

When I went on the Internet, I was surprised at how many templates for pumpkins there are! You will literally have hundreds of great free designs to choose from to be able to impress all your friends and family!


 This part is a little fiddly and is easier if you have another pair of hands to help with sticking the template to the side of your pumpkin. To stick my template I just used sellotape and a lot of patience.


Once you have your template in place, you need to score the pumpkin with a knife around the guidelines. You dont need to worry about pushing your knife all the way through at this stage as you will be able to take the template off the pumpkin after and see the lines you have created with the kinfe. Once you have done that, you can push the knife all the way through, cutting your design out and leaving you will a beautiful, detalied pumpkin! No more boring pumpkins!

Here is the finished result of my pumpkin. I am actually very happy with it! 


Although I don't have a halloween party to show this off, I think it makes a really cute candle holder perfect for autumn and dark evenings. 

Have fun craving your pumkins! 

Cheerio!
x


Tuesday, 14 October 2014

London and Handmade Goodies

Hello!
A couple of weeks ago I went along to my sister in law's (to be) hen party in London. I love the hussle and bussle of London, there is always something going on around every corner. One minute you are in the mist of all the west end theatre shows and overly cool bars, and the next you are slap bang in the middle of China! (Chinatown counts right!?)  But I have to say, I do prefer the more laid back lifestyle of Kent with both the sea and countryside on your doorstep. Plus it means that going to places like London can always feel a bit special.

On our hen adventure, we stopped off at a very cute craft workshop where we all made a very cute sock animals (yes I said sock!) I was a little terrified at the thought of having to create something that involved sewing, but it was much easier than I expected! The whole creation only included one sock, a little felt for eyes and ears and nose, some thread and of course stuffing! It was so simple that I am thinking about creating more sock based animals.


Unsurprisingly, I decided to make a cat and this is my attempt. Its not perfect, and i like to think that its not meant to be. It has that handmade feel about it! I think they are so cute, and if I do decided to  make more, they could be given as gifts for little ones! They are super soft and would look just adorable cuddled up in a pram with a baby! 

When we arrived at the craft workshop, it had been set up so cute, with quirky tea cups and glorious centre pieces that held a selection of scrummy cakes;I just had to take a picture of it before we ruined it while creating our masterpieces. 


Going on a craft workshop as part of hen party is an activity i would definitely recommend! Hen parties often mean you don't know everyone in the group, so doing an activity like this really breaks the ice. It also gets you ready for your night out so you can really let loose and enjoy yourself!

Keeping with the handmade theme, at the weekend my sister and I went to an amazing paint your own pottery coffee house. I have been to paint your own pottery a few times and absolutely loved it so i knew that this would be right up my street. It provides you with hours of fun, literally! We spent a good 2 hours deciding what our pottery design would be. We had both chosen to paint plates, and since the Christmas season is just around the corner, we decided to put the two togehter and make Christmas plates! There was so much to choose from! From the paint colours, to stencils we could use. We opted to use stenclis because the thought of doing the whole design freehand was far too stressful!

What makes this better, is that it only cost £8.50 per person. In total we stayed for around 4 hours and was well worth the money! Below are the finished products, and I have to say I am pretty impressed!


While we were blissfully painting away, we were brought tea and cake, which made the experience 10 times more exciting. It was a perfect way to spend a weekend with my sister! Have you ever been to a craft workshop or paint your own pottery? Isn't it amazing!? 

Cheerio! 
x

Sunday, 5 October 2014

Nails, Nails & more Nails

Hello! 
By looking at my previous posts, you may notice that I really enjoy being creative and one of my loves in life is nail painting and creating various designs that make my nails stand out,which usually includes some form of glitter! Although I really love getting my nails done, it can be quite expensive for us normal folk. As an alternative, I happily spend an afternoon painting my nails and trying out new designs. So I thought that it might nice to share some with you, explain how I do it and how easy it can be for an armature like me!

I created these first nails for a holiday that I went on this year, because who doesn't like having lovely nails when you are lounging around by the pool! I wanted to create something that looked like a sunset and it was super easy to do with a really lovely outcome.


First of all, I picked three colours that resembled a sunset. I chose pink, orange and yellow. I painted my nail with a plain white to start to give a nice base and make the colours pop that little bit more. Next I used a sponge ( nothing fancy, I just stole one from under the sink that we use for washing up!) and began painting a small line of pink at the edge of the sponge, next overlapping with a line of orange and then finally overlapping again with a line of yellow. I then took the sponge and rolled it across my nail making sure the yellow was at the tip of my nail. 


You have to be fairly quick with this because as you know sponges are very absorbent and if you aren't quick enough, it will drink all your lovely nail varnish leaving not a huge amount for your nails! I will usually repeat this process once more to give it a better covering. While the paint is still wet, take your best clear top coat varnish, because we don't want all this hard work to chip away the next day, and apply. The reason you need to apply the top coat while it is wet is because it blends the three colours together nicely giving it that sunset look. And that is all it takes! It might take a few practise runs to get it the way you want, but the outcome in the end is so worth it!

You can see that there is also a little glitter bow that I added for decoration. I bought the bow from eBay for just 99p! The temptation to have a little glitter in the sun was too much to resist! I glued it on with a little nail glue and sealed it with top coat. 

If you wanted to make this design a little less summery now that we are in the lovely season that is autumn, you can change the colours around with perhaps dark to light purples. It works with so many colours you can really get your creative bones working! 


The second design I wanted to show you is a far more Christmassy and of course includes glitter! 


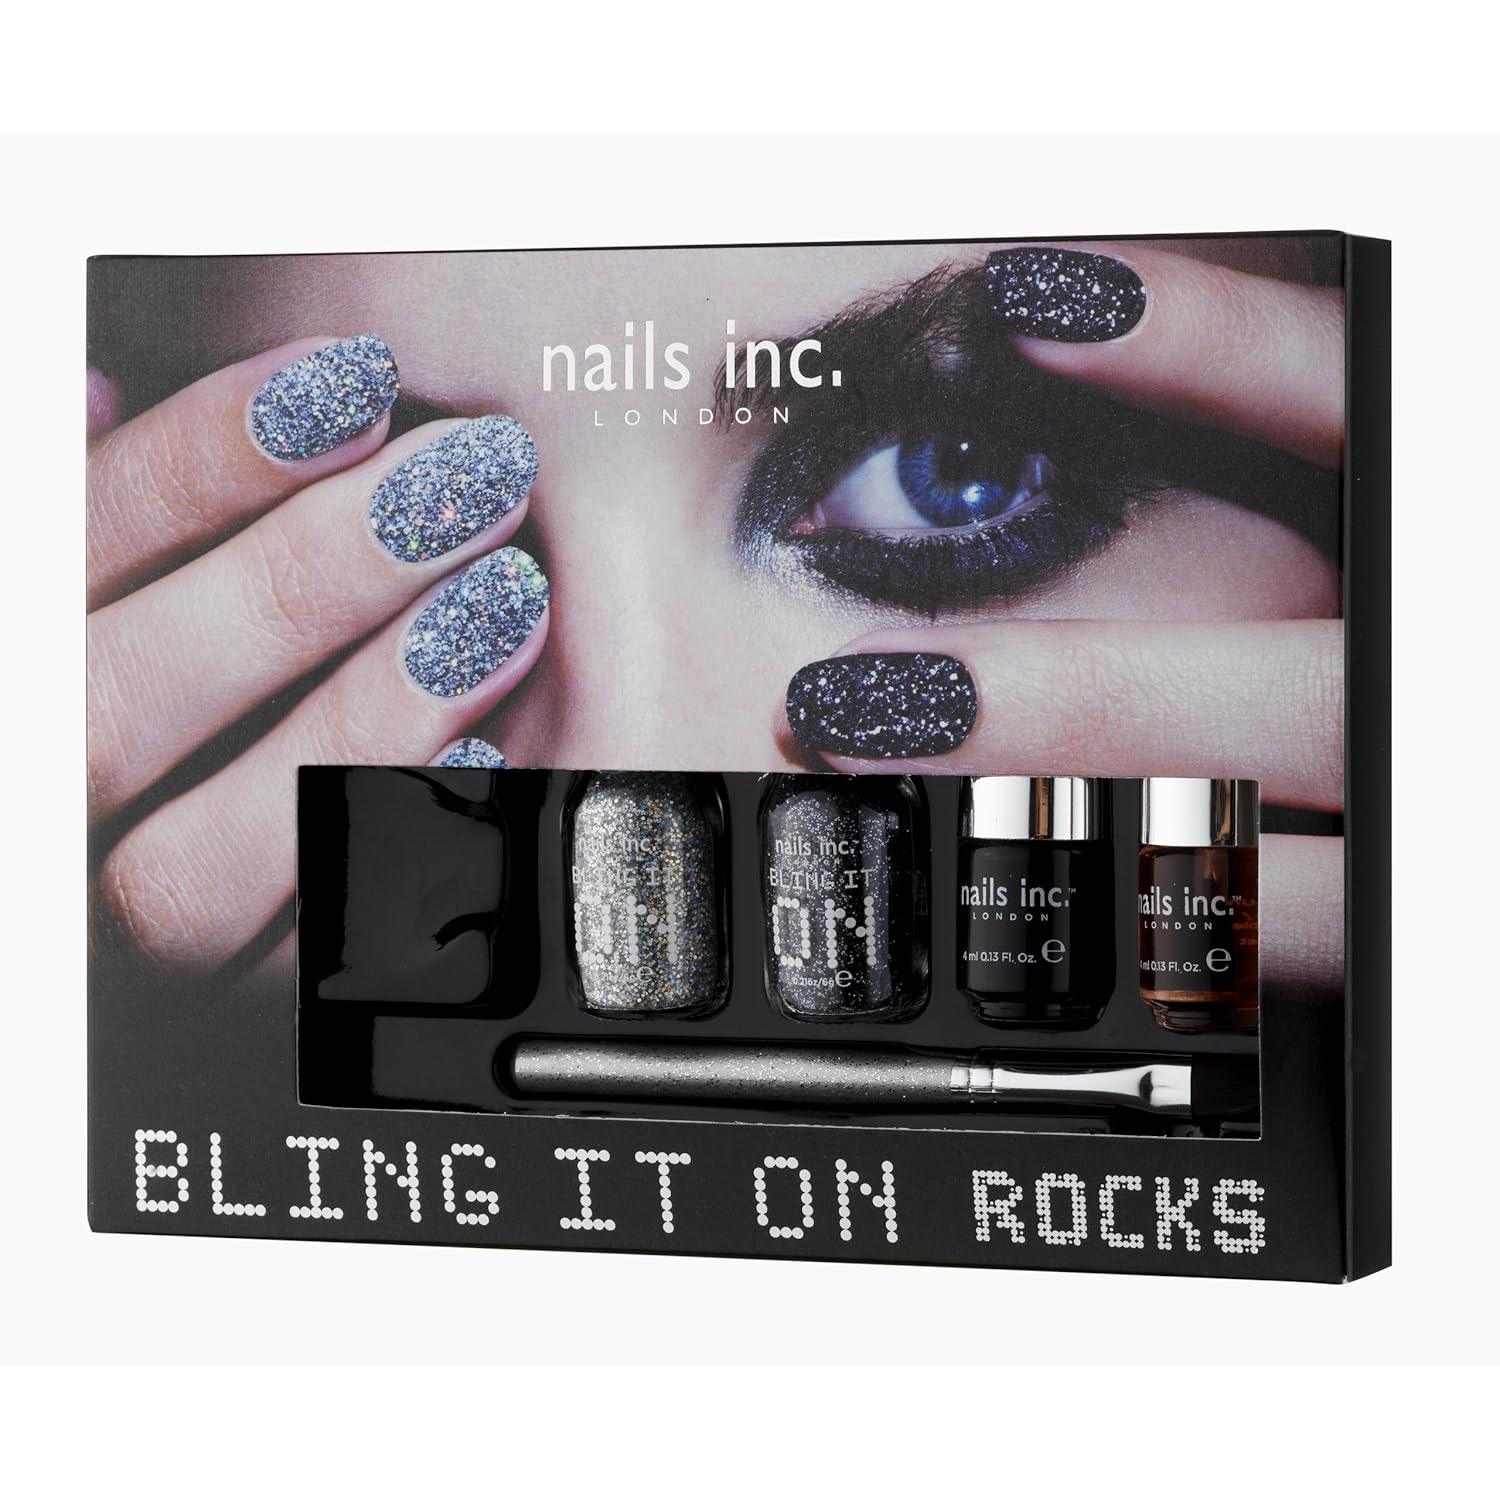
For this, I started off by applying fake plain stick on nails. I did this because my nails were very short and I think this look is better with longer nails. Again, this is such an easy design to create that has amazing results and looks just perfect for the run up to Christmas. I used a set called 'Bling it on Rocks' by Nails Inc that has two gorgeous pots of glitter, sliver and black, which i used for the tips of the nail.
 
Once I had all my nails on (that sounds awful!) I applied two coats of very Christmassy red nail varnish. After applying the second coat and while it was still wet, I poured a little of the sliver glitter on the tip of my nail and used a little brush, much like a makeup brush, to sweep the glitter up my nail. Be careful to not pour too much glitter on the nail as you only want a trail of glitter going up your nail. 


Once I had completed this with each of my nails, I applied my clear top coat to hold all the glitter in place and that was it! So simple and so wonderful!

This is only two of many designs that I like to create so if you would like to see more (one being Disney themed!!) let me know in the comments below! Remember I'm not a professional so literally anyone can do it!

Cheerio! 
x